
Dispatching Zones
As part of our Dispatching enhancement, P3 has introduced the concept of Zones to help dispatchers improve dispatching efficiency and to eliminate unnecessary travel time for technicians.
Dispatch Board – 2 Modes
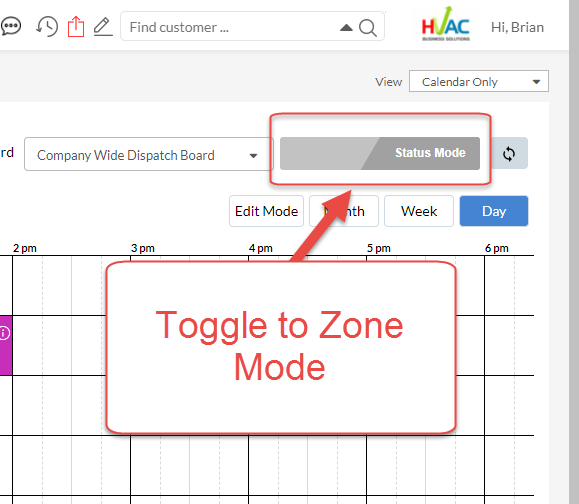
Once the Zones functionality is activated for your account, the Dispatch Board will have two Modes – Status Mode and Zone Mode.
Status Mode
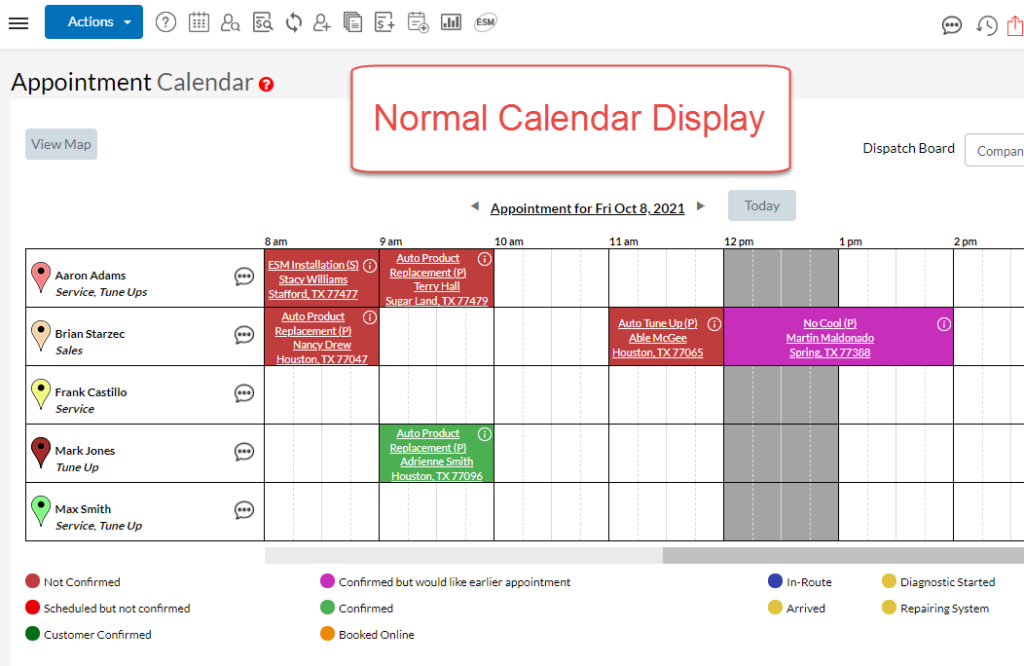
Status Mode is the default view and it displays the Status of every call on the Dispatch Board. This is the current, normal view and there are no changes to how it is displayed today.
Zone Mode
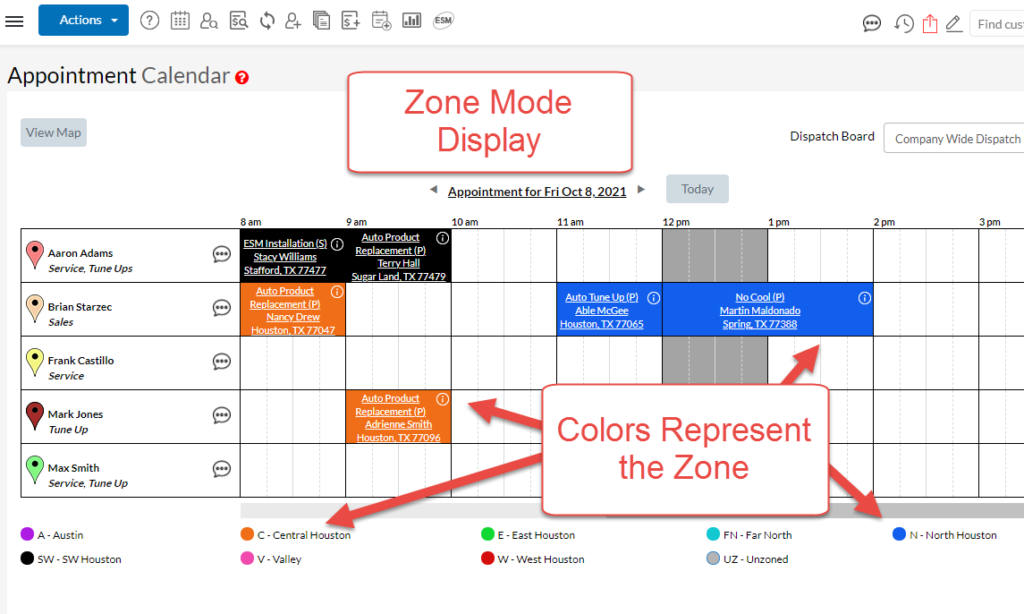
Zone Mode will change the display the color of each service call to the color associated with the appropriate zone. Now, everyone has a quick and easy method to determine if the service calls are scheduled within the same zone and are close to one another.
When the Dispatch Calendar is in Zone mode, the legend below the table switches to display what color each zone represents. Hover over the legend and it will display the full description of the zone.
Dispatch Board – Open Call List
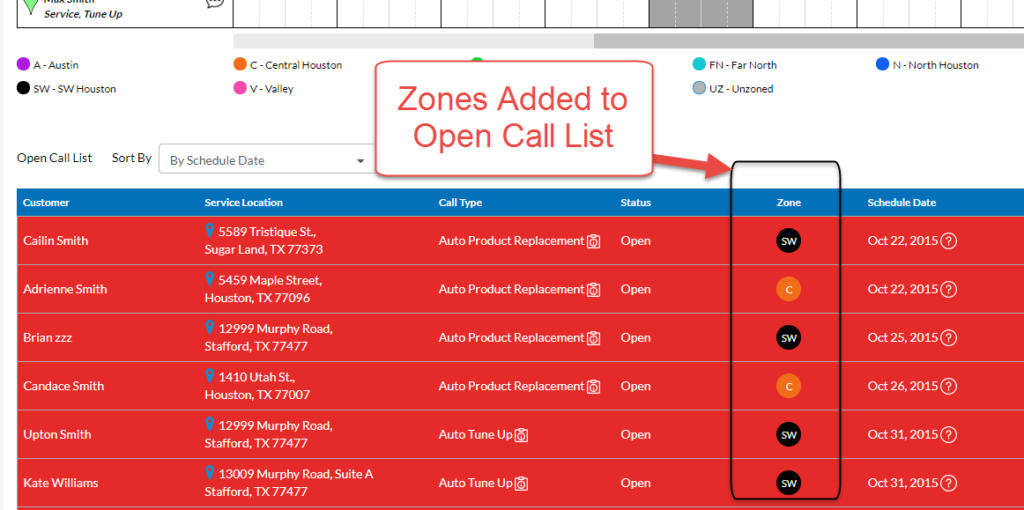
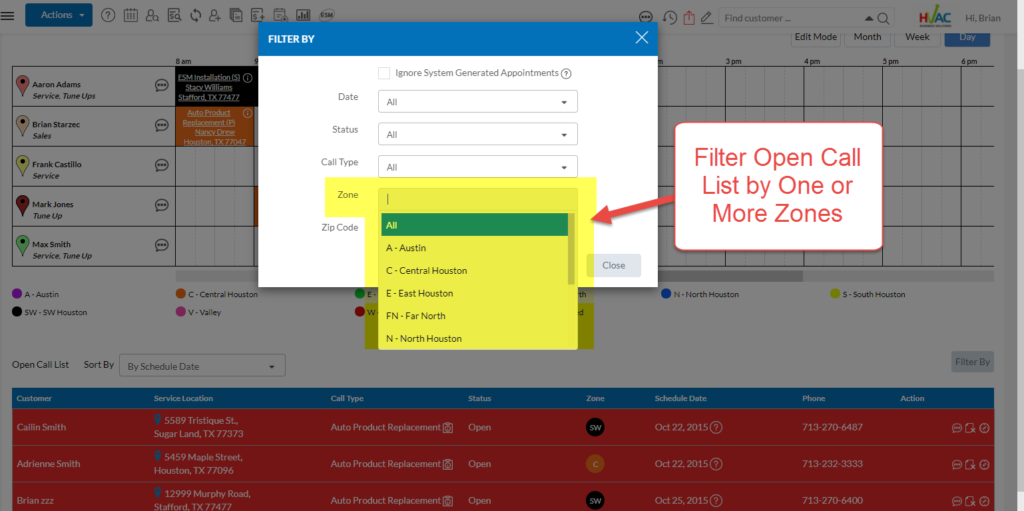
The Open Service Call table has a new column to display the Zone for each customer. Now, scheduling open calls is easier as you quickly know if a service call is in the same area as the calls currently on the schedule.
To help dispatchers further, the Open Call list can be filtered by Zones. This way the open call list can be quickly filtered down to just the calls that need to be done and are close to the ones already on the schedule for that day.
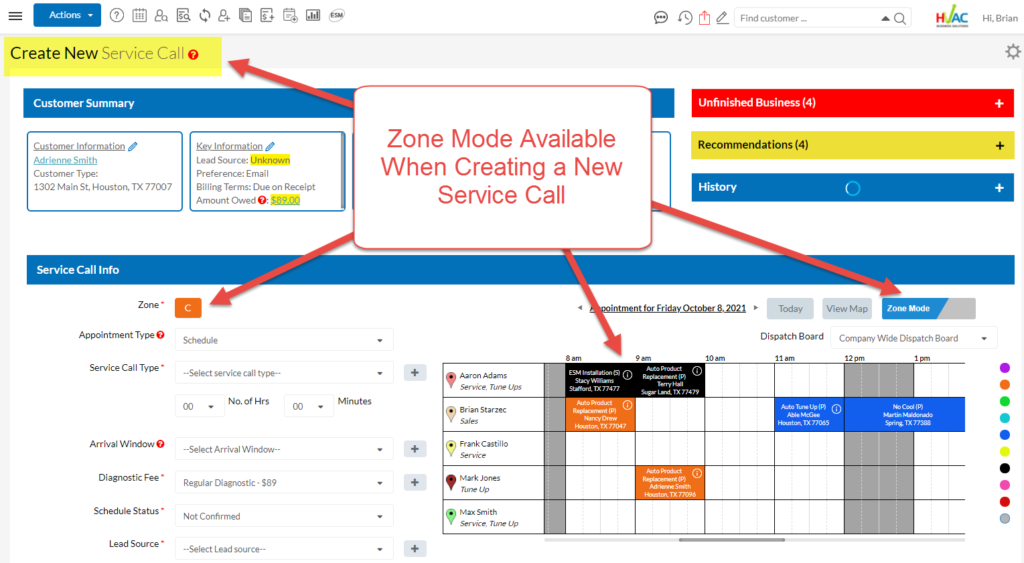
Create New Call – Zone Mode
When it comes to creating a new service call, the calendar that displays has the same ability to toggle between Status and Zone mode to assist during the actual booking process of the call. The behavior on the page is exactly the same as on the Dispatch Board – when in Zone mode, the color codes represent the Zones, rather than the Status of the calls.
How to Create Zones
Zone creation and editing is found in the Dispatching Settings section of the software. Once on the Zone List page, to create a new Zone, click on the “Create Zone” button.
Here you will need to:
- Provide a Name for the Zone
- Add an Abbreviation for the Zone
- Provide a Description
- Select a Color for the Zone
- Map out the zone
Above the map, there is a control where you can toggle between displaying the customer locations on the map and not displaying them. The default view is “No Pins” whereby no pins, representing the customer location, will be displayed.
Once you are ready to draw the zone, simply click on the map. This will create a point on the map. Then, move the mouse along the border of the zone that you want to create and click the mouse again to create a second point. When this happens the map automatically draws a line between the two points. Continue until you have the zone defined and then click the green Submit button at the bottom of the page.
Important Note
Due to the large number of customers that can be in any given zone, the process to associate each customer to the zone that is created can be time consuming. Therefore, to minimize the delay to the user and to minimize the burden on the servers, this assignment of customers to zones is completed at night.
Therefore, after you create your zones, no customers will be initially assigned to that zone. Then, the following day, you can return to the Zone List and see how many customers are assigned to each zone.
How to Create Zones
Although the bulk assignment of customers to zones happens overnight, when a new customer is created, the assignment happens immediately. There is no need to wait overnight in this situation. This way the functionality can be immediately used with new customers and they can be scheduled accurately.
Normal Calendar Display
Toggle out of Status Mode to Zone Mode
Zone Mode Display
Open Call List with Zones
Filter Open Call List by Zones
Create New Service Call with Zones – Just Match the Color
About P3 HVAC Software
We encourage you to review our site and learn about how we help HVAC Companies operate more efficiently. Please use this link to schedule a free demo of P3 HVAC Software. Lastly, be sure to check in weekly as we will post a new Tool Tip each Tuesday. Lastly, current users of P3 HVAC Software, please be sure to join our Private Facebook Group for great discussions with other HVAC Companies on how they are using the software for their HVAC business.
