
Time Blocks
Reserving Time Blocks on the Dispatch Calendar is a new concept in Version 13.0.
This is a Setting that must be activated, but when activated, the software will provide a way to reserve or hold an appointment time on the calendar, without having to enter the details.
This was designed for those peak call volume situations where there is not enough time to complete the service call in the software. Now, you can reserve a block of time on the calendar and then come back to it later to provide the details.
The “Hold” or “Reserve” will last for a set period of time after which it will be automatically removed, if it has not been converted into a normal service call by that time.
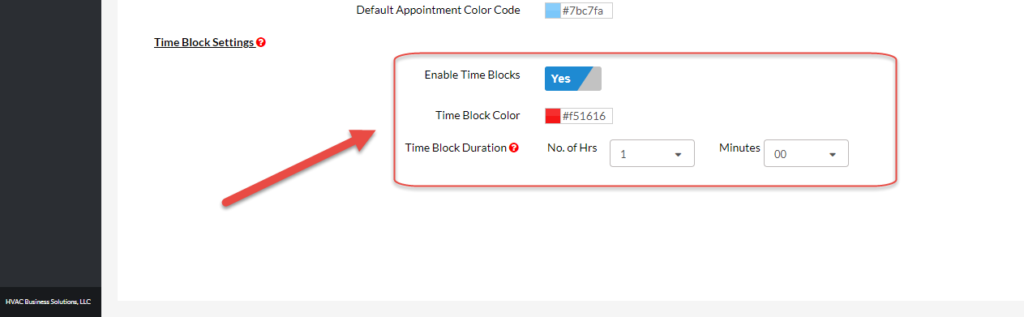
How to Activate
- From the Command Center, click on Settings (left menu)
- Go to Dispatching Setting section
- Click on General Settings
- Go to the Time Block Settings section (bottom of the page)
- Change value of “Enable Time Block” to “Yes“
- Provide a “Time Block Color” – this is the color of the block when displayed on the Dispatch Calendar
- Enter the “Time Block Duration” – this is how long the Time Block will remain on the Dispatch Calendar before being removed if it is not converted to a Service Call
- Click Save
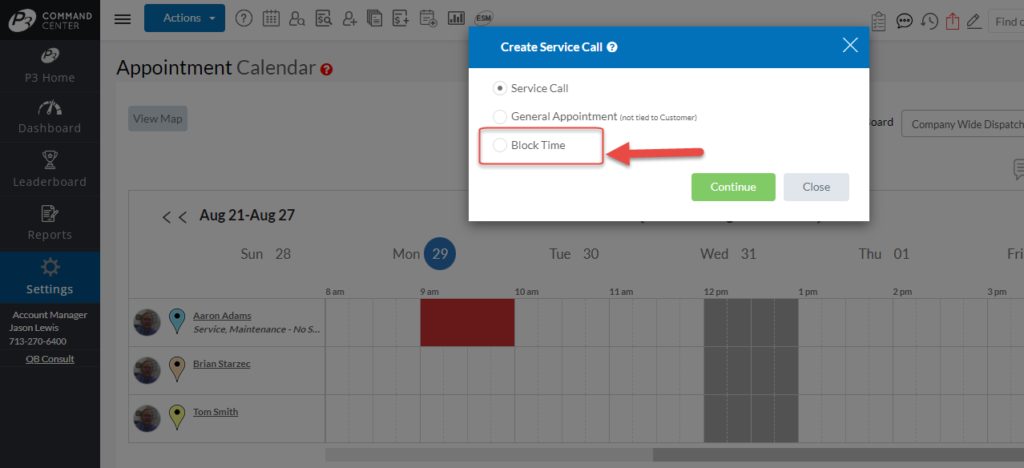
How to Block Time on the Calendar
- Go to the Dispatch Calendar
- Click on the time where you want the Time Block to start
- From the Popup, select the Option for “Block Time”
- Enter the Duration – this is the amount of time to block on the calendar – block the morning, one hour, etc – you will see the block updating on the calendar as this is changed
- Click Continue
- Review Warning, click Ok
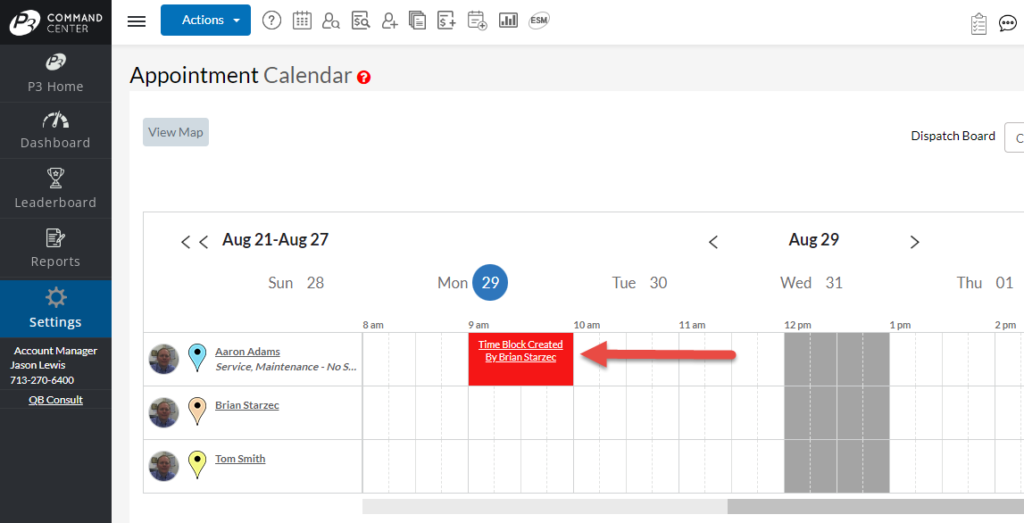
How to Convert Time Block to Appointment
- From the Dispatch Calendar, click on the Time Block
- Click the “Create Call”
- Follow the normal process to create a service call or generic call
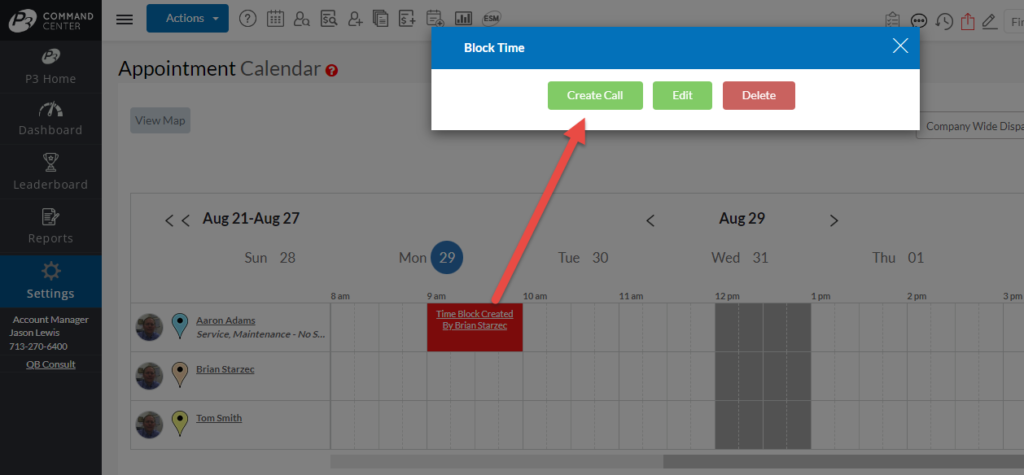
How to Remove Time Block on Calendar
- Automatically – Let the time expire without booking a call – Time Block automatically removed
- Manually – click on the Time Block, click Delete
Please note that you can only manually delete a Time Block that you created.
Lastly, a Time Block can be edited to change the display if so desired.
Setting
Creating a Block
Display on Calendar
Calendar Options
About P3 HVAC Software
We encourage you to review our site and learn about how we help HVAC Companies operate more efficiently. Please use this link to schedule a free demo of P3 HVAC Software. Lastly, be sure to check in weekly as we will post a new Tool Tip each Tuesday. Lastly, current users of P3 HVAC Software, please be sure to join our Private Facebook Group for great discussions with other HVAC Companies on how they are using the software for their HVAC business.
